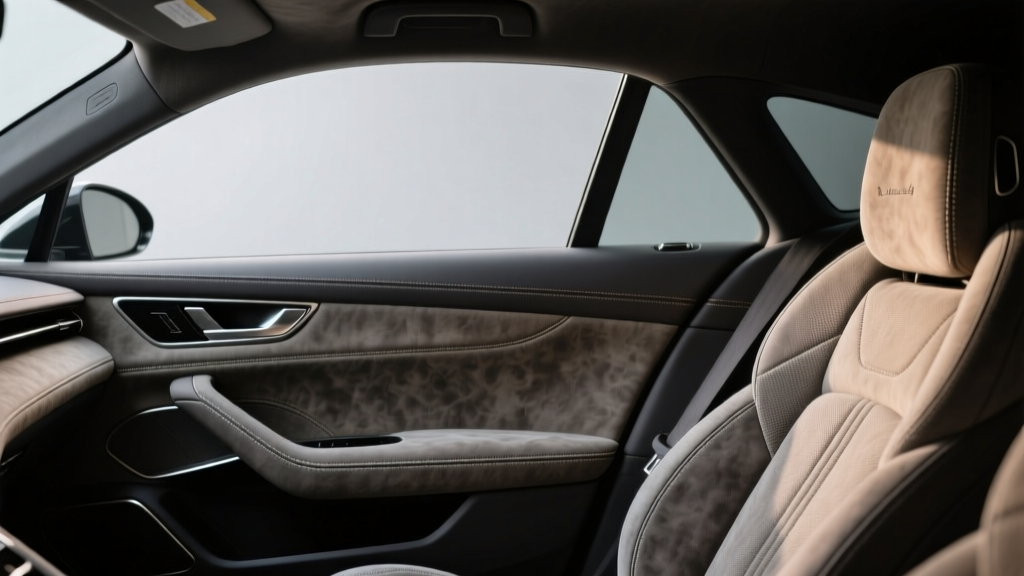
Alcantara Installation: Custom Techniques (2026)
Alcantara has become the go-to upgrade for enthusiasts who want a cabin that feels closer to a modern performance car than a daily driver. It?s tactile, premium-looking, and it instantly changes how a steering wheel, headliner, or door panel feels in your hands. But when Alcantara is installed poorly, it also becomes one of the quickest ways to make an interior look ?DIY??wrinkles, lifting edges, mismatched nap, and seams that telegraph through the surface.
This guide focuses on advanced Alcantara installation customization techniques that separate a professional-grade result from an average re-trim. You?ll learn how to plan patterns, manage direction and nap, wrap complex shapes, hide seams, and choose adhesives and backing materials that survive heat, UV exposure, and daily use. Whether you?re wrapping a steering wheel, re-skinning door inserts, or doing a full headliner, these methods help you build a durable, OEM-plus finish.
The goal isn?t just to stick Alcantara onto a part?it?s to make it look like it was designed that way from the factory, while customizing it to your taste.
Understanding Alcantara: Material Types, Nap Direction, and Backing
Alcantara vs. ?Suede? and why it matters
True Alcantara is a branded microfiber material known for consistent texture, color stability, and durability. Many ?microsuede? alternatives can look fine initially but may stretch unevenly, glaze faster, or fade sooner. For high-touch items (steering wheels, shifter boots), the quality difference becomes obvious within months.
Nap direction (the pro detail many people miss)
Alcantara has a nap?fibers that lay in a direction. Brush it one way and it looks darker; brush it the other way and it looks lighter. That means:
- Every piece in your cabin should be planned for consistent nap direction (especially left/right door panels).
- Seams become more visible if two adjacent pieces have opposing nap directions.
- Photos can exaggerate mismatch?what looks ?off? in images can be nap-related rather than color.
Backing options and when to use them
Backing affects stretch, seam quality, and how well Alcantara conforms to curves.
- No foam backing: Best for tight curves and steering wheels; shows imperfections more, so prep must be perfect.
- 2?3 mm foam backing: Great for door inserts, dash pieces, and flat panels; hides minor substrate texture and gives a plush look.
- Scrim-backed materials: Useful for stability and reducing distortion on larger sections like headliners.
Tooling and Materials: What Pros Rely On
Core tools
- Plastic trim tools (to avoid marring)
- Sharp snap-off knife + spare blades (Alcantara dulls blades fast)
- Fabric shears (dedicated to fabric only)
- Heat gun with adjustable temp (and restraint?too much heat can warp plastics)
- Seam roller / J-roller (small and medium sizes)
- Chalk pencil or silver fabric marker
- Masking tape (for patterning and clean edges)
- Lint roller and nitrile gloves (keeps oils off the surface)
Adhesives: spray vs. brush-on contact cement
Heat resistance is the biggest deciding factor for interiors. A headliner in summer heat and a dash panel in direct sun can punish weak adhesives.
Product recommendations (common pro choices)
- 3M 90 Spray Adhesive: Stronger than light-duty sprays; good for many trim pieces. Use with proper ventilation.
- 3M 38808 Headliner & Fabric Adhesive: Designed for overhead applications; good tack, controlled spray.
- 3M Super 77: Convenient but often too light for high-heat areas; better for temporary positioning than final bonds.
- Brush-on high-temp contact cement (trim-grade): Excellent for edges, tight wraps, and areas that lift. Often the ?secret weapon? for long-term durability.
Real-world tip: Many experienced trimmers use a hybrid approach?spray for large areas, brush-on contact cement on edges, corners, and high-stress zones.
Advanced Planning: Patterning, Seams, and Design Choices
Pattern-making with masking tape (clean and repeatable)
For complex parts, freehand cutting is where mistakes happen. Tape patterns give you precision and symmetry.
- Apply masking tape over the part, overlapping strips until the surface is covered.
- Mark seam lines, reference marks, and nap direction arrows on the tape.
- Carefully peel the tape ?skin? off as one piece (cut relief slits if needed).
- Lay it flat on the back of the Alcantara and trace your pattern.
- Add seam allowance (typically 6?10 mm depending on stitch and edge finish).
Seam placement: hide them where the eye expects lines
Seams should follow factory geometry and natural breaks:
- Along body lines or molded edges
- Behind trim strips or at transitions (plastic-to-fabric)
- Underneath parts (steering wheel underside seam, console underside wrap)
Example: On a door card insert, place your seam where the insert meets the hard plastic border. On a dash accent strip, hide the seam on the underside edge where it tucks behind the dash.
Nap and symmetry planning for multi-piece installs
- Mark an arrow on the backing of each cut piece showing nap direction.
- For left/right pieces (doors, pillars), mirror the pattern but keep nap consistent.
- Lay all pieces on a clean surface before gluing and compare under the same light.
Surface Prep: The Difference Between ?Stuck? and ?Stays?
Cleaning and decontamination
- Wash the part with mild soap and water if needed; dry completely.
- Degrease using isopropyl alcohol (70?90%) on a lint-free cloth.
- For oily plastics, use a dedicated plastic-safe degreaser, then alcohol wipe.
Sanding and smoothing
- Remove gloss and texture where required using 320?600 grit sanding.
- Feather edges so the wrapped transition doesn?t show through.
- Repair gouges with flexible filler (especially on soft-touch parts).
Primers and adhesion promoters (when to consider)
If you?re wrapping low-surface-energy plastics or parts that previously had silicone dressing, an adhesion promoter can prevent future lifting. Use sparingly and follow manufacturer flash times.
Step-by-Step: Advanced Alcantara Wrapping Technique (Trim Pieces & Inserts)
1) Dry-fit, mark, and pre-trim
- Lay the Alcantara over the part without adhesive.
- Mark centerlines and alignment points on the backing.
- Rough-cut leaving generous excess (25?40 mm) for wrapping edges.
2) Apply adhesive in controlled zones
- Mask off areas you don?t want overspray on.
- Spray adhesive on both the part and the backing of the Alcantara (for contact-style spray adhesives).
- Let it tack up?usually 30?90 seconds depending on product and temperature.
- Start by bonding the center area, then work outward.
Pro tip: Don?t glue the entire piece at once on complex shapes. Work in sections so you can stretch and place the material accurately without trapping wrinkles.
3) Manage curves: stretch, relief cuts, and heat (lightly)
- Use tension, not brute force: Pull steadily and evenly; over-stretching can thin the nap and change the look.
- Relief cuts: On hidden wrap edges, make small V-cuts to let the fabric lay flat without bunching.
- Heat discipline: Use minimal heat to help conform?too much heat can distort plastic substrates and weaken some adhesives.
4) Roll and set the bond
- Use a seam roller to press the material into contours.
- Focus on edges, corners, and recessed areas where lift usually begins.
- Brush the nap lightly after bonding to keep a uniform finish.
5) Finish edges like a trimmer
Clean edges are what make Alcantara look factory.
- Wrap-and-tuck: Wrap excess behind the panel and tuck into channels using a plastic tool.
- Back-cut method: For visible openings (switch holes), cut an X from the center outward, fold tabs inward, then glue.
- Edge reinforcement: Brush-on contact cement at edges prevents peeling in heat cycles.
Advanced Customization Techniques (Beyond Basic Wrapping)
Hidden seams and ?invisible? transitions
- Seam-under-trim: End Alcantara under a plastic trim strip or bezel.
- Skived edges: Thin the backing at edges (when possible) to reduce a noticeable step.
- Overlap seams (strategically): In hidden areas, a small overlap can be stronger than a butt seam.
Two-tone layouts with consistent nap
Two-tone Alcantara looks premium when the layout feels intentional.
- Use factory-inspired split lines (center stripe, inset panels, or top/bottom divisions).
- Keep nap direction consistent within each color field.
- Test the combo under sunlight and interior lighting?some colors shift dramatically.
Foam backing for a ?padded OEM? look
Adding thin foam behind Alcantara can mimic modern luxury inserts.
- Apply foam to the substrate first (spray adhesive on both surfaces).
- Trim foam cleanly at edges and openings.
- Apply Alcantara over foam using controlled tension to avoid compression lines.
Steering wheel and high-touch upgrades (when to DIY vs. outsource)
Steering wheels require stitching, seam placement precision, and durable edge finishing. If you?re committed to DIY, practice on a spare wheel or a cheap rim first. For a daily-driven car, professional rewrap is often the best value because:
- Seams and thickness feel ?right? in-hand
- Airbag and trim fitment is preserved
- Wear zones are reinforced correctly
Product Comparisons: Choosing the Right Alcantara for Your Use Case
- Headliner: Scrim-backed or foam-backed materials + headliner-rated adhesive for overhead heat cycling.
- Dash trims: Thin backing (or none) for crisp edges; prioritize high-temp adhesive.
- Door inserts: 2?3 mm foam-backed Alcantara for a plush look; add edge reinforcement glue.
- Shifter/boot: High-quality Alcantara with strong backing; consider double-stitching and reinforced stress points.
Common Mistakes to Avoid (and how to fix them)
- Skipping nap planning: Results in mismatched panels. Fix by re-cutting with consistent nap; brushing alone won?t fully hide it.
- Using weak adhesive in hot areas: Leads to bubbles and lifting. Fix by peeling back carefully, cleaning residue, and re-bonding with high-temp contact cement.
- Gluing everything at once: Traps wrinkles. Fix by working in sections and reactivating adhesive only where needed (if product allows).
- Over-stretching: Causes shiny spots and thin nap. Fix is usually replacement?avoid by using relief cuts and smarter seam placement.
- Dull blades: Creates fuzzy edges and ugly seams. Fix by changing blades constantly and cutting from the backing side when possible.
- Not reinforcing edges: Corners lift first. Fix by adding brush-on contact cement at perimeter wraps and high-stress recesses.
FAQ: Advanced Alcantara Installation
How do I keep Alcantara from peeling in summer heat?
Use a high-temp-rated adhesive, prep the surface thoroughly (degrease + light scuff), and reinforce edges with brush-on contact cement. Peeling almost always starts at edges and corners, so that?s where you overbuild strength.
Can I install Alcantara over existing vinyl or soft-touch coating?
Sometimes, but it?s risky. Soft-touch coatings can fail underneath and cause lifting later. The best practice is to remove failing coatings, smooth the substrate, then wrap. If you must wrap over existing material, test adhesion in a hidden area first.
Why does my Alcantara look lighter/darker in certain spots?
That?s usually nap direction or localized compression from stretching/rolling. Lightly brushing the surface can help even the appearance, but if two panels have opposite nap direction, it will always look mismatched under certain lighting.
What?s the best way to wrap tight inside corners without wrinkles?
Work in small glued sections, use gentle heat, and make relief cuts on hidden wrap areas. If the corner is truly extreme, consider a seam placement change?strategic seams often look more professional than fighting a corner in one piece.
Is foam backing always better for a premium look?
No. Foam backing adds plushness on flat or gently curved panels, but it can make sharp edges look rounded and can complicate tight contours. For steering wheels, sharp trim edges, and intricate shapes, thin or no backing is usually the better choice.
How do I clean Alcantara after installation?
Use a soft brush to lift the nap, a damp microfiber cloth for light cleaning, and a dedicated Alcantara/upholstery cleaner for stains. Avoid soaking it and avoid silicone-based interior dressings?they can darken the surface and attract grime.
Next Steps: Plan Your Project Like a Pro
Start by choosing one manageable piece?door insert, dash trim strip, or a center console panel?so you can refine your technique before tackling a headliner or steering wheel. Buy a little extra material for test wrapping and practice relief cuts and edge finishing on a scrap panel. Most ?pro-level? results come from planning: patterning, nap direction alignment, and controlled adhesive work.
- Pick your first target part and inspect it for sharp contours, recesses, and seam hiding spots
- Decide on nap direction and sketch seam lines before cutting material
- Choose an adhesive strategy: spray for main surfaces, brush-on cement for edges
- Do a dry-fit and tape pattern?then commit to glue in sections
If you want more interior upgrade ideas and hands-on how-tos, explore more guides on carinteriormix.com?and keep building a cabin that feels as good as it looks.